So here goes for my first tutorial : Adding texture to text in Photoshop.
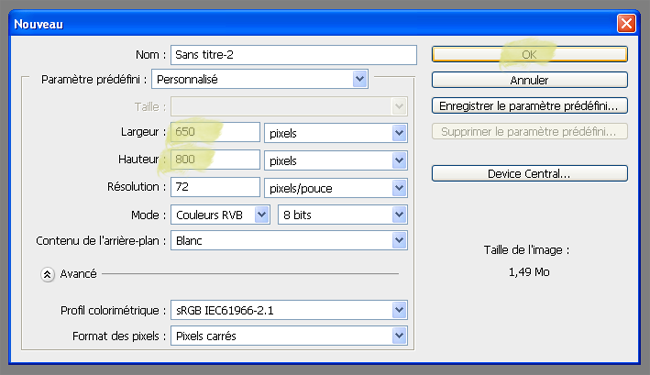
First Step. Start by opening a new document in Photoshop. For this, go to File > New.
Choose a height and width for your document (here I used a width of 650px and a height of 800px). Then press Ok.
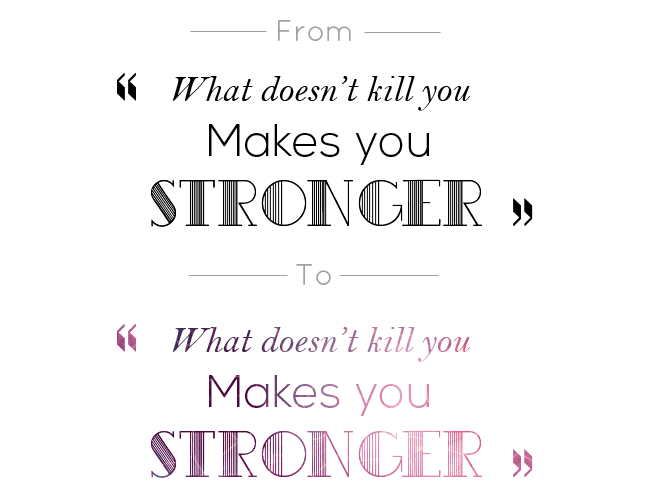
Second step. Next Click on the Type Tool and write your text on the blank document.
Don't hesitate to try out fancy fonts. Here I used Bell MT, Nexa, Benthem, and Broadway.


Third Step. Choose and open your texture in Photoshop.
Here I used a texture from Texture Pack 17 by Sirius-s dz.

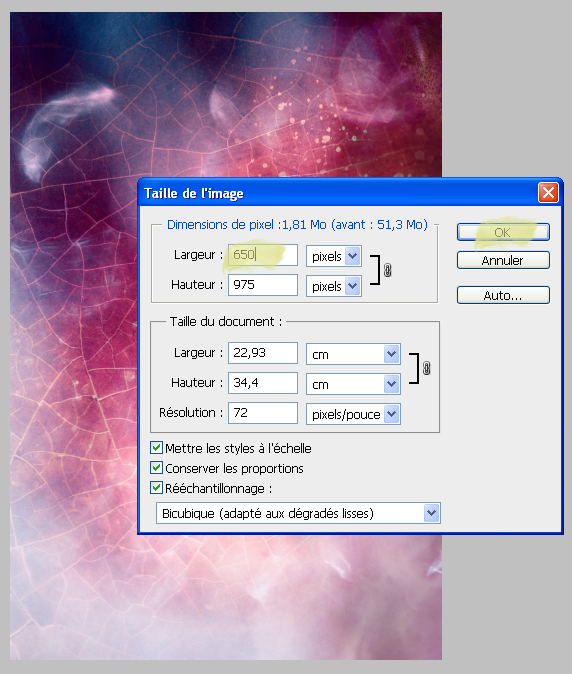
You might want to resize your texture to fit your document. For this go to Image > Image Size, and change the width of the texture to fit your document.
Now copy and paste your texture onto your document. First select the texture by clicking on it then go to Select > All. Next go to Edit > Copy, then click on your document containing your text and go to Edit > Paste.
You can also use the shortcuts Ctrl+A (Select), Ctrl+C (Copy), Ctrl+V (Paste).
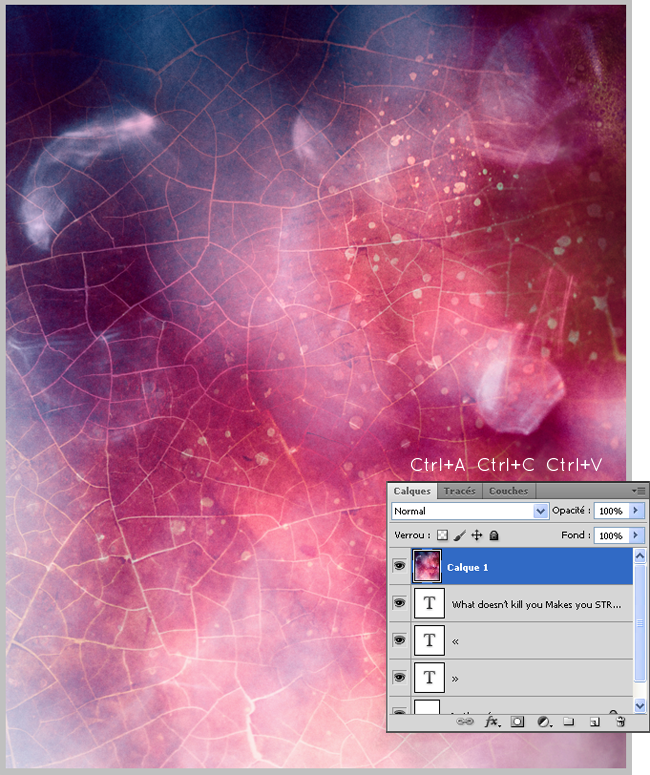
Fourth Step. Place your texture layer above your text layer as shown above. Then right-click on the texture layer in the Layers window and select Create Clipping Mask.
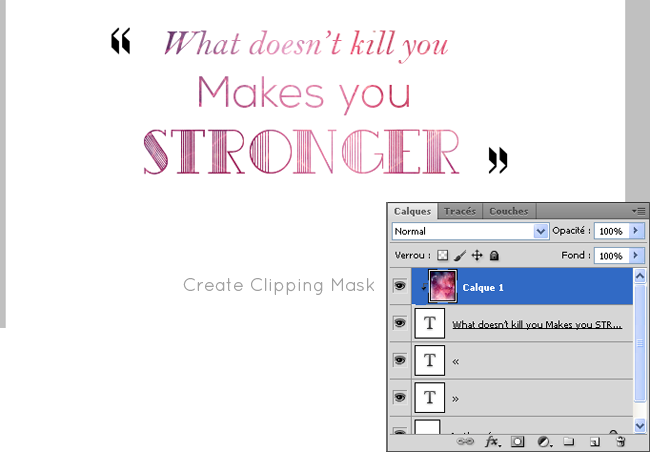
The texture has now replaced the black colouring of your text. You can move the texture layer around until you are satisfied with the result.
If you have more than one text layer you can open and import another texture and repeat the steps.If you want to use the same texture as used before, you can also duplicate the texture layer by right-clicking on it and selecting Duplicate Layer. Then move the layer above you other text layer. And create a new Clipping Mask as done before.
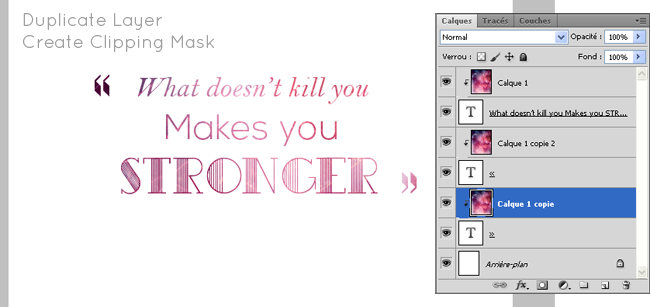
Et voilà ! Now you have a fancy textured text.
Don't forget to play around and experiment with different textures and different fonts.
You can also try using this technique on brushes to create unique effects for you headers and buttons :
Don't hesitate to post a comment if you have a question ! :)

First Step. Start by opening a new document in Photoshop. For this, go to File > New.
Choose a height and width for your document (here I used a width of 650px and a height of 800px). Then press Ok.

Second step. Next Click on the Type Tool and write your text on the blank document.
Don't hesitate to try out fancy fonts. Here I used Bell MT, Nexa, Benthem, and Broadway.


Third Step. Choose and open your texture in Photoshop.
Here I used a texture from Texture Pack 17 by Sirius-s dz.

You might want to resize your texture to fit your document. For this go to Image > Image Size, and change the width of the texture to fit your document.

Now copy and paste your texture onto your document. First select the texture by clicking on it then go to Select > All. Next go to Edit > Copy, then click on your document containing your text and go to Edit > Paste.
You can also use the shortcuts Ctrl+A (Select), Ctrl+C (Copy), Ctrl+V (Paste).

Fourth Step. Place your texture layer above your text layer as shown above. Then right-click on the texture layer in the Layers window and select Create Clipping Mask.

The texture has now replaced the black colouring of your text. You can move the texture layer around until you are satisfied with the result.
If you have more than one text layer you can open and import another texture and repeat the steps.If you want to use the same texture as used before, you can also duplicate the texture layer by right-clicking on it and selecting Duplicate Layer. Then move the layer above you other text layer. And create a new Clipping Mask as done before.

Et voilà ! Now you have a fancy textured text.
Don't forget to play around and experiment with different textures and different fonts.
You can also try using this technique on brushes to create unique effects for you headers and buttons :
 |
| Star texture by dastardly-icons |
Don't hesitate to post a comment if you have a question ! :)
